ES3C35P 3.5-Inch ESP32-S3 Display Setup and Touch Test
Set up the ES3C35P display, run an LVGL example, and build a touch counter with the Arduino demo.
On this page
Identify the ES3C35P boardPower on and check the USB connectionRun the manufacturer display and touch demoLVGL lesson 1: Run the board demoLVGL lesson 2: Build the Arduino exampleLVGL lesson 3: Make a touch counterLVGL troubleshooting and version checksDisplay and touch pin referenceTroubleshoot a blank screen or unresponsive touchManufacturer files and product support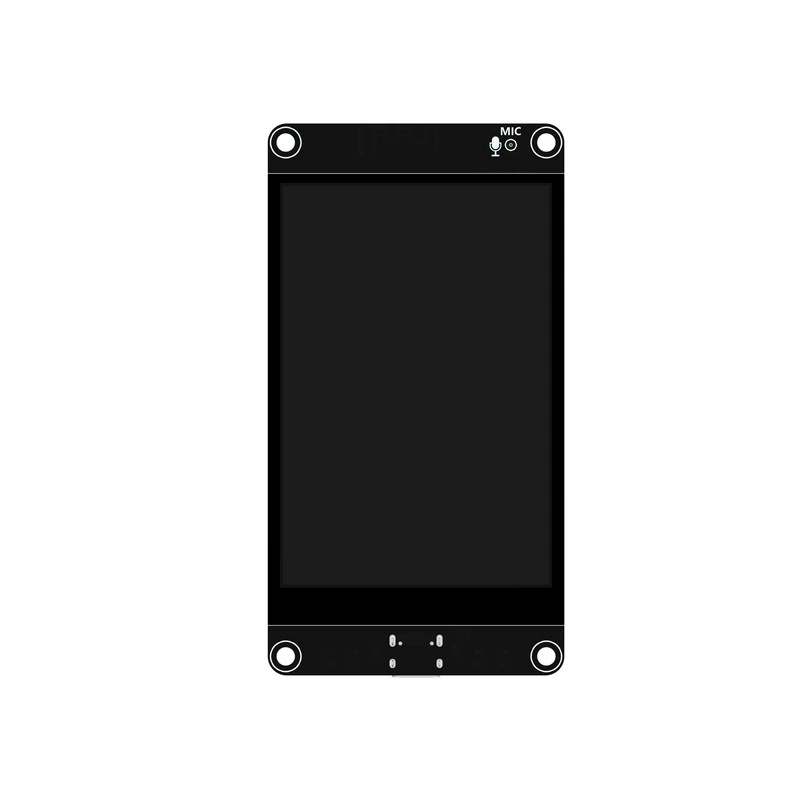
Identify the ES3C35P board
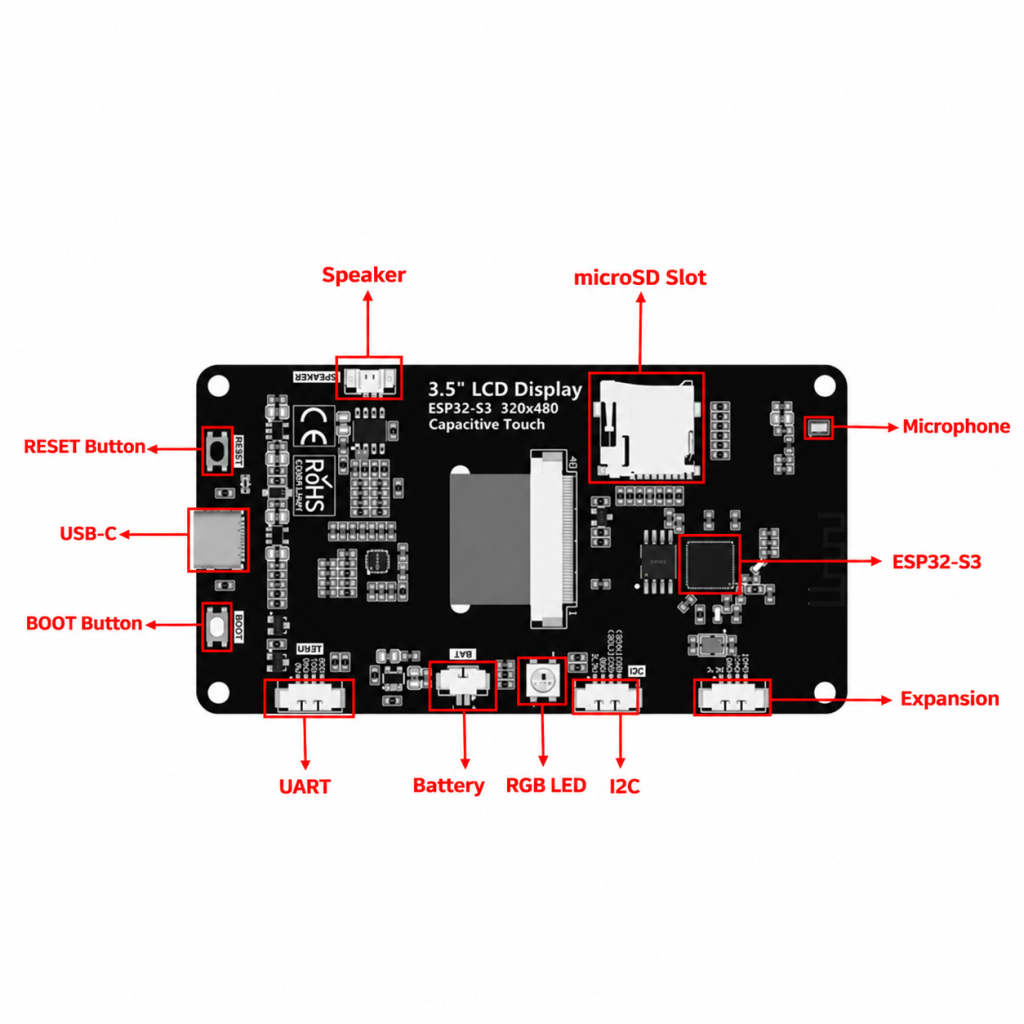
This guide covers the ES3C35P capacitive display sold as DS42060. Look for the rear marking 3.5-inch LCD Display / ESP32-S3 320 x 480 / Capacitive Touch. The board uses an ST77922 QSPI display, a 320 × 480 IPS panel, I2C capacitive touch, 16 MB flash and 8 MB PSRAM. Match the rear markings, connector layout and revision before loading firmware.
Power on and check the USB connection
- Connect the board to a computer using a USB-C data cable. The board takes 5 V through USB-C. Keep external peripherals and batteries disconnected for this first check.
- Watch for a screen update or a backlight change, and check the operating system for a USB serial port. Unplug and reconnect to identify the right port.
- If a factory demo starts, test the screen and touch before reflashing. If you plan to replace existing firmware, save any configuration and obtain a matching recovery image first.
Run the manufacturer display and touch demo
Use the ES3C35P quick-start package in LCDWiki's documentation section. The package supplies a board-specific test image and the manual describes the Windows flashing workflow. Use the tool version, filenames and settings specified for the package you download.
- In the flash tool choose ESP32-S3, select the board's serial port and select the merged quick-start binary from the ES3C35P package.
- The manufacturer shows address
0x0, DIO and 80 MHz for that specific merged demo image. For other images, use the offsets and settings supplied with those files. - Start the upload and wait until it finishes. Press RESET or power-cycle the board. If the flash tool cannot connect, hold BOOT, press and release RESET, then release BOOT and retry with the port that appears.
- Confirm that the demo renders cleanly and touch input follows your finger. If the demo offers a target or drawing screen, check the center and each corner.
For source-based development, start with the exact manufacturer's display example and its stated ESP-IDF or Arduino toolchain version. Test display and touch first, then add project code to that configuration.
LVGL lesson 1: Run the board demo
LVGL draws widgets and handles touch events. The ES3C35P board example supplies the ST77922 QSPI display driver, touch driver and LVGL port that connect those widgets to this hardware.
- Open the manufacturer quick-start section and download its ES3C35P quick-start package and manual. Extract the package and choose
bin/LVGL/lv_demo_widgets.binto test widgets and touch first. Leave the benchmark, music and stress demos for later. The supplier package may also contain a Xiaozhi voice image for a different purpose. - Follow the merged-image procedure above using the USB serial port for the board. Press RESET after the tool reports completion.
- Test one button or slider in the demo. Then check center and corner touches. Record whether video, touch and orientation each work before changing examples or firmware settings.
LVGL lesson 2: Build the Arduino example
- Get the manufacturer data package from LCDWiki and locate the Arduino LVGL demo. One published copy uses
Example_08_LVGL_Demos/LVGL_Demos/LVGL_Demos.ino. Keep the entire sketch folder together, includingdisplay.h,esp_bsp.c,lv_port.cand the ST77922 driver files. - Install the Espressif Arduino board package and use the version and board settings documented for your downloaded example. Select an ESP32-S3 board profile with the correct memory settings if instructed by the package. For this N16R8 board, check for 16 MB flash and OPI PSRAM. Connect by USB-C, then select the port that appears when the board is plugged in.
- For the Arduino example using
LV_DISP_ROT_90andlv_btn_create(), the example README specifies LVGL 8.3.9 or a later 8.x version. Use itslv_conf.hand ensure Arduino resolves that LVGL installation. If the unmodified demo includes<demos/lv_demos.h>, follow the package's instruction for placing demo sources underlvgl/src/demosand enable the matching demo inlv_conf.h. - Verify and upload the original sketch. Open Serial Monitor at 115200 baud for the mirrored example, then press RESET. Look for messages that panel initialization and UI creation completed. Repeat the touch test from lesson 1 before editing the UI.
The Arduino LVGL 8 example mirror can help locate files and compare the setup code. Use the manufacturer package for the board-specific download and dependencies.
LVGL lesson 3: Make a touch counter
In a copy of the working Arduino sketch, paste this code after the includes and before setup(). It creates a label, a button and an event callback that updates the label when the button is tapped.
#include <stdio.h>

static unsigned int tap_count = 0;
static lv_obj_t *count_label;

static void count_tap(lv_event_t *event)
{
    (void)event;
    char text[32];
    snprintf(text, sizeof(text), "Taps: %u", ++tap_count);
    lv_label_set_text(count_label, text);
}

static void create_touch_counter_ui(void)
{
    lv_obj_t *screen = lv_scr_act();

    count_label = lv_label_create(screen);
    lv_label_set_text(count_label, "Taps: 0");
    lv_obj_align(count_label, LV_ALIGN_CENTER, 0, -40);

    lv_obj_t *button = lv_btn_create(screen);
    lv_obj_set_size(button, 150, 56);
    lv_obj_align(button, LV_ALIGN_CENTER, 0, 20);

    lv_obj_t *caption = lv_label_create(button);
    lv_label_set_text(caption, "Tap me");
    lv_obj_center(caption);
    lv_obj_add_event_cb(button, count_tap, LV_EVENT_CLICKED, NULL);
}
Inside setup(), replace the demo call, such as lv_demo_stress();, with create_touch_counter_ui();. In the mirrored sketch, put that call between the existing bsp_display_lock(0); and bsp_display_unlock();. Keep the panel and touch initialization, display task and backlight calls from the example. If your copy only used <demos/lv_demos.h> to run the demo, you can remove that include once the last demo call is removed.
Verify, upload and reset. The first screen should read Taps: 0. Tap and release the button three times and check that the label reads Taps: 3. Reset the board and check that it returns to zero. This counter runs in RAM and does not store taps across a restart.
As a small follow-up exercise, change the button caption and move it using lv_obj_align(). Then test that your visible button and its touch target still line up.
LVGL troubleshooting and version checks
| Symptom | What to check |
|---|---|
Missing lv_conf.h or demo header |
Check which LVGL folder the Arduino build log selected. Use the configuration and demo sources for that same installation. |
lv_btn_create or LV_DISP_ROT_90 not found |
Check the LVGL major version. LVGL 9 uses a different button name and display API. Build the original LVGL 8 example first if following this lesson. |
| The image rotates but the touch locations do not | Restore the original board example rotation, then use that port's rotation setting for display and touch together. Retest the four corners after each change. |
| Allocation errors or resets on UI creation | Check OPI PSRAM detection and the buffer settings from the working example. Reduce image assets and revert custom buffer changes one at a time. |
| Screen freezes during custom updates | Keep event callbacks short. Let the board port service LVGL. When updating widgets from a different task, use the port's documented lock or queue mechanism. |
For an ESP-IDF project, start with the vendor example and use its specified ESP-IDF and LVGL versions. The widget logic carries over to an LVGL 8 project once the board port is initialized. Use the correct locking API for that port. See the manufacturer ESP-IDF porting notes and the LVGL 9 event reference if you plan a version migration.
The Arduino insertion point and API calls were reviewed against the published example and LVGL source. The counter and flashing steps have not been tested on a physical retail unit.
Display and touch pin reference
These are the signal assignments in the ES3C35P manufacturer reference. Compare them with the documentation for your board revision before editing a pin map.
| Function | ES3C35P signals |
|---|---|
| LCD QSPI | CS GPIO10, CLK GPIO12, D0 GPIO11, D1 GPIO13, D2 GPIO14, D3 GPIO9 |
| LCD reset and backlight | Reset shares EN. Backlight control is GPIO41. |
| Capacitive touch | SDA GPIO38, SCL GPIO39, reset GPIO48, interrupt GPIO47. Touch I2C address 0x38. |
| Shared I2C bus | The touch controller, audio codec and expansion connector share GPIO38 and GPIO39. |
Troubleshoot a blank screen or unresponsive touch
| Symptom | Check |
|---|---|
| No serial port | Try another USB data cable and a direct port. Use BOOT and RESET to enter download mode and check for a new port. |
| Backlight on, screen blank | Run the matching ST77922 QSPI example. Check panel initialization, resolution and the QSPI pin map. |
| Screen works, touch does not | Power up with nothing touching the screen. Disconnect add-ons from I2C, then check the touch address, reset and interrupt pins. |
| Touch follows the wrong axis | Check screen rotation and match the touch coordinate transform to the display orientation. |
| Resets when adding peripherals | Test the bare board again over USB-C and reconnect peripherals individually to isolate power or bus problems. |
Manufacturer files and product support
This guide is based on the supplied board documentation and the manufacturer quick-start procedure. Firmware upload and touch testing on the retail unit have not been bench verified. For support, share the SKU, a photo of the rear markings, the example filename and any serial errors.
Share the product link, hardware revision, software version and any error messages.
Contact ESP32S support →