
EMC/EMI Checklist Before Your Board Goes to Certification
EMC testing is expensive, and failing it is worse than the test fee — it costs you a respin, a
The ESP32 isn't just another microcontroller; it's a phenomenon that has democratized professional-grade IoT development. When it burst onto the scene as the powerful successor to the beloved ESP8266, it set a new standard: dual-core processing, robust Wi-Fi, Bluetooth connectivity, and an arsenal of peripherals—all for the price of a coffee. As someone who has guided thousands of developers from their first blinking LED to complex, deployed systems, I've seen the common hurdles. This guide is more than a tutorial; it's your curated roadmap, consolidating years of hands-on experience to help you bypass frustrations and unlock the board's full potential with confidence and clarity.
If you're holding a board for the first time or considering which one to buy, you're in the right place. We'll move from theory to practice, covering not just "how" to set things up, but "why" certain choices matter for your project's success.
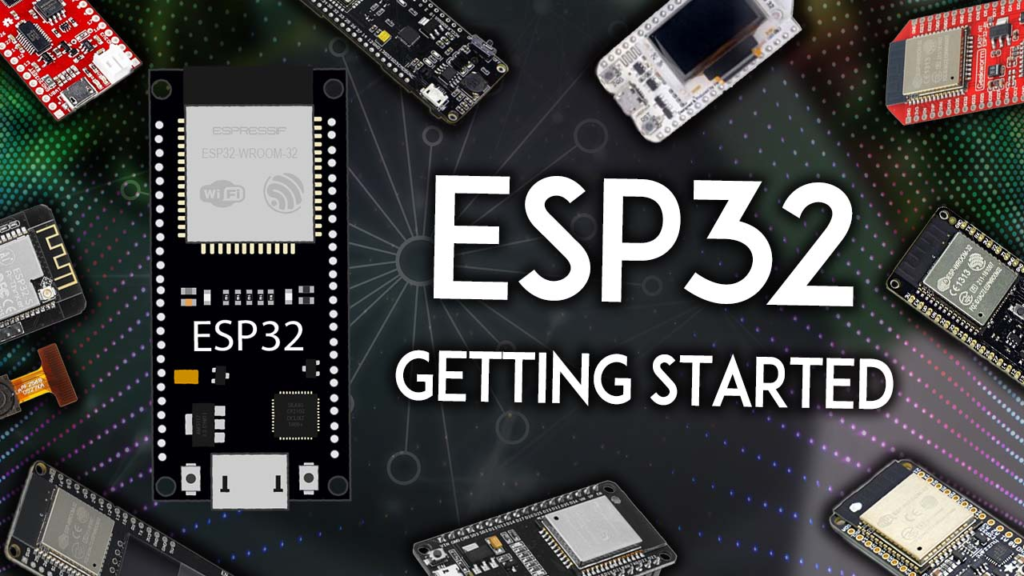
At its heart, the ESP32 is a feature-rich System-on-a-Chip (SoC). To build effectively, you need to understand what these features truly mean for your projects.
The ESP32's dual-core Xtensa LX6 processor (typically running at 160 or 240 MHz) is its engine. Unlike single-core microcontrollers, this allows you to dedicate one core to critical timing tasks (like sensor reading) and the other to network communication, preventing your Wi-Fi stack from blocking a motor control signal. This architectural advantage is a primary reason it outclasses its predecessor.
Wi-Fi (802.11 b/g/n): Beyond just connecting to a network, the ESP32 excels in creating stable Access Point (AP), Station (STA), and hybrid AP+STA modes. This flexibility is the bedrock of local device networks in home automation.
Bluetooth Classic & Low Energy (BLE): This dual support is rare. Use Bluetooth Classic for audio streaming or high-throughput data, and BLE for years of battery life in beacon or sensor tag applications.
Confusion about memory is common. Here’s a practical breakdown:
RAM (512KB SRAM): This is your working memory for variables and program execution. Efficient coding is key here.
Flash (typically 4MB or 16MB on dev boards): This is where your program code and file system (like SPIFFS or LittleFS) are stored. It's non-volatile, so your program persists after power-off.
RTC Fast/Slow Memory (16KB total): A small but crucial amount of memory that remains powered during Deep Sleep, allowing you to save critical variables without draining the battery.
The ESP32's true power lies in its input/output capabilities, most of which are multiplexed, meaning you can assign functions (like I2C or SPI) to a wide range of pins via software.
Analog-to-Digital Converters (ADC): 18 channels of 12-bit resolution for reading sensors (like potentiometers, temperature probes).
Digital-to-Analog Converters (DAC): 2 channels for generating true analog voltages (for audio, control signals).
Touch Sensors: 10 capacitive pins that can detect human touch without mechanical buttons—perfect for sleek interfaces.
Communication Protocols: Multiple UART, I2C, and SPI interfaces allow you to connect displays, sensors, SD cards, and more simultaneously.
Pulse-Width Modulation (PWM): Control servo motors, LED brightness, or motor speed on almost any output pin.
Choosing between them is straightforward:
Choose the ESP8266 if your project is simple, cost-sensitive, and only requires basic Wi-Fi connectivity (e.g., a single sensor data logger).
Choose the ESP32 if you need more power, Bluetooth, more I/O pins, touch sensors, or dual-core processing (e.g., a smart device with a display, multiple sensors, and BLE remote control).
The "ESP32" chip itself is tiny and needs supporting circuitry. Development boards package this neatly. Here’s how to choose wisely:
For most newcomers, I strongly recommend starting with a generic ESP32 DEVKIT DOIT or ESP32 NodeMCU-32S board. They offer:
Built-in USB-to-Serial Chip (CP2102 or CH340): For easy programming.
3.3V Voltage Regulator: Safe power via USB or external source.
Reset & Boot Buttons: Essential for uploading code.
Breadboard-Friendly Design: Pins fit directly into solderless breadboards.
Clear Pin Labels: Makes following tutorials and pinouts easier.
Widely Available Documentation & Community Support: Crucial for troubleshooting.
| Board Recommendation | Best For | Key Features & Notes |
|---|---|---|
| ESP32 DEVKIT DOIT | Beginners, General Projects | Robust, minimal, excellent community support. The baseline choice. |
| ESP32-PICO-D4 | Space-Constrained Products | Incredibly small SiP (System in Package). Less I/O exposed. |
| ESP32-CAM | Video & Image Projects | Integrates a camera module and microSD slot. Requires separate FTDI programmer. |
| TTGO T-Display | Projects Needing a Screen | Has a built-in small OLED display. Slightly more complex pinout. |
| Adafruit HUZZAH32 | Battery-Powered Projects | Includes advanced battery charging/protection circuitry. |
Check the USB Chip: Ensure you know if it's CP210x or CH340 to download the correct driver.
GPIO Access Matters: A 30-pin board has fewer accessible I/O than a 38-pin version. Plan your project's sensor count.
Antenna Options: Boards with a u.FL/IPEX connector allow you to attach an external antenna for significantly improved Wi-Fi range.
This is the most common stumbling block.
Plug your board into your computer.
Open Device Manager (Windows) or System Information (Mac).
Identify the unknown device. Its name will hint at the chip (e.g., "CP2102" or "CH340").
Download the official driver from Silicon Labs (CP210x) or WCH (CH340).
Install, restart, and verify the board appears as a USB Serial Port (COM# on Windows, /dev/cu.usbserial- on Mac).
While PlatformIO (VSCode extension) is more powerful, the Arduino IDE is perfect for starting.
Download & Install the latest Arduino IDE from arduino.cc.
Add the ESP32 Board Manager URL:
Go to File > Preferences.
In "Additional Boards Manager URLs," paste: https://espressif.github.io/arduino-esp32/package_esp32_index.json
Install the ESP32 Platform:
Go to Tools > Board > Boards Manager...
Search for "esp32" and install "esp32 by Espressif Systems."
This verifies your entire toolchain.
In Arduino IDE, select your board (e.g., ESP32 Dev Module) and the correct COM port.
Open File > Examples > 01.Basics > Blink.
Important ESP32 Change: The onboard LED is usually on GPIO 2. Change the line int led = 13; to int led = 2;.
Click Upload. Hold the "BOOT" button if the upload fails (some boards need this).
Witness the blue LED blink! You've successfully programmed an ESP32.
Power Pins: Use 3V3 and GND to power sensors. VIN can accept 5V from an external supply.
Strapping Pins (GPIOs 0, 2, 12, 15): These have special boot-time functions. Avoid using them for critical I/O if possible.
GPIO 34, 35, 36, 39: These are INPUT-ONLY pins. They cannot be used for output functions like driving an LED.
Default I2C Pins: GPIO 21 (SDA), GPIO 22 (SCL). You can remap these in software.
ADC2 Pins (GPIOs 0, 2, 4, 12-15, 25-27): A crucial limitation: ADC2 cannot be used when Wi-Fi is active. For analog sensing with Wi-Fi, use ADC1 pins (GPIOs 32-39).
Always refer to a pinout diagram for your specific board model. A generic diagram is provided below, but variations exist.
With the basics solid, the world opens up. Here are curated next steps:
Learn Wi-Fi Basics: Create a simple web server to control an LED from your browser.
Explore Sensor Integration: Connect a DHT11 (temperature/humidity) or BMP180 (pressure) sensor over I2C.
Master Deep Sleep: Reduce power consumption to microamps for battery-powered projects.
Build a Dashboard: Use a service like Adafruit IO or MQTT to send sensor data to the cloud.
Try a Framework: Graduate to ESP-IDF for maximum control or MicroPython for rapid Python-based prototyping.
"Upload fails randomly": Ensure you have a quality USB cable that supports data transfer. Cheap charge-only cables are a leading cause of issues.
"Board not recognized": Reinstall the correct USB driver. On Windows, use the "Delete driver software" option when uninstalling in Device Manager.
"Wi-Fi is unstable": Keep the board away from large metal surfaces. For critical applications, use a board with an external antenna option.
"Analog readings are noisy": Use a 0.1µF ceramic capacitor between the sensor's power and ground, close to the ESP32. Use the analogReadMilliVolts() function for better accuracy.
The ESP32 is a platform that scales with you. It welcomes beginners with a gentle Arduino curve while offering the depth professionals demand for commercial products. This guide has equipped you with the foundational knowledge—the understanding of why things work—that most tutorials skip. By starting with a recommended board, methodically setting up your environment, and respecting the pinout guidelines, you've built a stable foundation.
The next step is action. Modify that blink sketch, change the delay, and watch your command alter a physical device. That moment of tangible interaction is the spark. From here, you can build anything from a smart garden monitor to a wireless security system. The community is vast, the resources are plentiful, and the only limit is your imagination.
======================================
No account yet?
Create an Account