
EMC/EMI Checklist Before Your Board Goes to Certification
EMC testing is expensive, and failing it is worse than the test fee — it costs you a respin, a
The ESP32 is more than a microcontroller; it's a gateway to the Internet of Things (IoT). By combining its Wi-Fi capability with a simple servo motor, you can create interactive projects that you control from any device on your local network. This comprehensive guide will walk you through building a web server with the ESP32 that lets you control a servo motor in real-time using a slider on a webpage.
Whether you're aiming to build a smart pet feeder, a remote-controlled camera mount, or a prototype for a connected device, mastering this skill is fundamental. This tutorial is designed not only to make your project work but to help you understand the underlying principles of web servers, PWM control, and safe hardware interfacing, following best practices for reliability and performance.
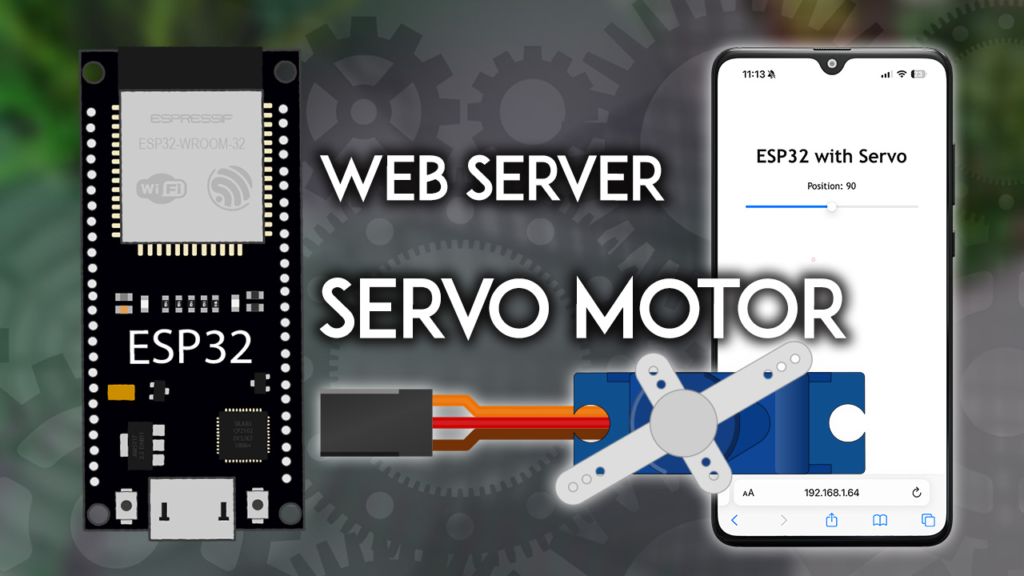
A servo motor is a compact device that rotates its shaft to a precise angular position, typically between 0 and 180 degrees. Unlike regular motors that spin continuously, servos are designed for controlled movement. They contain a small DC motor, gears, and control circuitry. They are controlled by a Pulse Width Modulation (PWM) signal, where the width of the electrical pulse (usually between 1ms and 2ms) determines the shaft's position.
Common Servo Wire Color Code:
Power (VCC): Red
Ground (GND): Black or Brown
Signal (PWM): Yellow, Orange, or White
⚠️ The most common mistake is powering the servo directly from the ESP32's 3.3V pin for anything but the smallest micro-servos.
Small Servo (e.g., SG90): Can be powered from the ESP32's VIN pin (if your USB provides 5V) for simple testing. The VIN pin provides the input voltage from your USB or external power supply (usually 5V).
Standard or Multiple Servos: You must use an external 5V power supply. A servo in motion can draw significant current (hundreds of mA), causing voltage drops that can reset your ESP32 or damage its voltage regulator.
Safe Wiring for External Power: Connect the external power's 5V and GND to your breadboard's power rails. Connect the servo's power wire to the 5V rail and its ground wire to the GND rail. Crucially, also connect this external GND rail to one of the ESP32's GND pins. This creates a common ground, which is essential for the signal to be interpreted correctly.
While the ESP32 can generate PWM on most GPIOs, some pins have restrictions:
Recommended PWM Pins: GPIOs 13, 12, 14, 27, 26, 25, 33, 32 are generally safe and easy to use.
Pins to Avoid: GPIOs 34, 35, 36, 39 are input-only and cannot be used for PWM output.
Use with Caution: GPIOs 6, 7, 8, 9, 10, 11 are often connected to the integrated flash memory and are not recommended for other uses to prevent crashes.
For this tutorial, we will use GPIO 13.
Micro Servo Motor (e.g., SG90 or MG90S)
Breadboard and Jumper Wires (Male-to-Male)
Micro-USB Cable for programming and power.
(Recommended) External 5V Power Supply (e.g., a bench power supply or a dedicated 5V adapter with a DC barrel jack).
Follow this diagram to connect your components. The diagram assumes the use of the ESP32's VIN pin for servo power for simplicity, but remember the power considerations above.
        Servo Motor
        -----------
        |         |
    Red (PWR) ----> ESP32 VIN Pin
    Brown (GND) --> ESP32 GND Pin
    Orange (SIG) --> GPIO 13
Expert Tip: If using an external 5V supply, connect the servo's PWR and GND to the external supply's rails, and connect the GND rail to the ESP32's GND.
Open Arduino IDE, go to File > Preferences.
In "Additional Boards Manager URLs," paste: https://raw.githubusercontent.com/espressif/arduino-esp32/gh-pages/package_esp32_index.json
Go to Tools > Board > Boards Manager, search for "esp32", and install the "Espressif Systems" platform.
We will use the ESP32Servo library, which handles the complex timer configurations of the ESP32 for us.
In Arduino IDE, go to Sketch > Include Library > Manage Libraries...
Search for "ESP32Servo" by Kevin Harrington and Mads Hobye.
Click "Install".
Below is the complete, annotated code for your ESP32 servo web server. Copy it into your Arduino IDE.
/*********
 * ESP32 Servo Motor Web Server
 * Complete project details at https://RandomNerdTutorials.com/esp32-servo-motor-web-server-arduino-ide/
 * Adapted and enhanced for reliability and clarity.
 *********/

#include <WiFi.h>
#include <ESP32Servo.h>

// Create a servo object
Servo myServo;

// GPIO pin for the servo signal
static const int servoPin = 13;

// Replace with your network credentials
const char* ssid = "YOUR_WIFI_SSID";      // e.g., "MyHomeNetwork"
const char* password = "YOUR_WIFI_PASS";  // e.g., "MyStrongPassword"

// Set web server port number to 80 (standard for HTTP)
WiFiServer server(80);

// Variable to store the current servo position (0-180)
String currentPosition = "90"; // Start at 90 degrees

// Client timeout variable
unsigned long currentTime = millis();
unsigned long previousTime = 0;
const long timeoutTime = 5000; // 5 second client timeout

void setup() {
  Serial.begin(115200);

  // Attach the servo to the specified pin
  myServo.attach(servoPin);
  myServo.write(90); // Initialize servo to center position
  delay(1000); // Allow servo time to move to initial position

  // Connect to Wi-Fi
  Serial.print("Connecting to ");
  Serial.println(ssid);
  WiFi.begin(ssid, password);

  while (WiFi.status() != WL_CONNECTED) {
    delay(500);
    Serial.print(".");
  }

  // Print connection details
  Serial.println("\nWiFi connected.");
  Serial.print("IP address: ");
  Serial.println(WiFi.localIP()); // You will NEED this address!

  // Start the web server
  server.begin();
  Serial.println("HTTP server started. Open the IP address in your browser.");
}

void loop() {
  WiFiClient client = server.available(); // Listen for incoming clients

  if (client) {
    Serial.println("New Client connected.");
    String currentLine = "";
    String header = "";
    currentTime = millis();
    previousTime = currentTime;

    // Client connection loop
    while (client.connected() && currentTime - previousTime <= timeoutTime) {
      currentTime = millis();

      if (client.available()) {
        char c = client.read();
        Serial.write(c); // Echo to Serial Monitor for debugging
        header += c;

        if (c == '\n') {
          // End of client HTTP request
          if (currentLine.length() == 0) {
            // Send a standard HTTP response header
            client.println("HTTP/1.1 200 OK");
            client.println("Content-type:text/html");
            client.println("Connection: close");
            client.println(); // Blank line marks end of header

            // --- Send the HTML Web Page ---
            client.println("<!DOCTYPE html><html>");
            client.println("<head><meta name=\"viewport\" content=\"width=device-width, initial-scale=1\">");
            client.println("<link rel=\"icon\" href=\"data:,\">");
            client.println("<style>");
            client.println("body { text-align: center; font-family: Arial, sans-serif; margin-top: 50px;}");
            client.println(".slider { width: 80%; max-width: 400px; margin: 20px auto; }");
            client.println("</style>");
            client.println("<script src=\"https://ajax.googleapis.com/ajax/libs/jquery/3.6.0/jquery.min.js\"></script>");
            client.println("</head><body>");

            client.println("<h1>ESP32 Servo Controller</h1>");
            client.println("<p>Current Position: <strong><span id=\"posText\">" + currentPosition + "</span>°</strong></p>");
            client.println("<input type=\"range\" min=\"0\" max=\"180\" value=\"" + currentPosition + "\" class=\"slider\" id=\"servoSlider\">");

            // JavaScript for dynamic updates
            client.println("<script>");
            client.println("var slider = $('#servoSlider');");
            client.println("var posText = $('#posText');");
            client.println("slider.on('input change', function() {");
            client.println("  var pos = $(this).val();");
            client.println("  posText.text(pos);");
            client.println("  $.get('/?value=' + pos);"); // Send GET request with new position
            client.println("});");
            client.println("</script>");

            client.println("</body></html>");
            client.println();

            // --- Process the Request ---
            // Check if the client request contains a "?value=" parameter
            if (header.indexOf("GET /?value=") >= 0) {
              // Extract the position value from the header string
              int valueStart = header.indexOf('=');
              int valueEnd = header.indexOf(' ', valueStart);
              String valueStr = header.substring(valueStart + 1, valueEnd);

              // Validate and update the servo
              if (valueStr.toInt() >= 0 && valueStr.toInt() <= 180) {
                currentPosition = valueStr;
                myServo.write(valueStr.toInt());
                Serial.println("Servo moved to: " + valueStr + " degrees");
              }
            }
            break; // Exit the while loop
          } else {
            currentLine = ""; // Clear the line for the next read
          }
        } else if (c != '\r') {
          currentLine += c; // Add character to the current line
        }
      }
    }

    // Close the connection
    client.stop();
    Serial.println("Client disconnected.\n");
  }
}
Network & Server Setup: The code connects to your Wi-Fi and starts a web server on port 80. The WiFi.localIP() printed to the Serial Monitor is the address you'll type into your browser.
HTML Interface: The server sends a minimalist, mobile-friendly webpage containing a title, a display of the current angle, and a slider (<input type="range">).
JavaScript (AJAX): The magic of smooth, no-refresh updates happens here. The $.get('/?value=' + pos) jQuery command sends a background HTTP GET request to the ESP32 every time you move the slider, passing the new position.
Request Parsing: In the loop(), the ESP32 constantly checks incoming client data. When it detects a request string like /?value=45, it extracts the number 45, converts it to an integer, and commands the servo to move to 45 degrees using myServo.write().
Replace Credentials: In the code, change YOUR_WIFI_SSID and YOUR_WIFI_PASS to your actual 2.4 GHz network details.
Upload: Connect your ESP32 via USB, select the correct board (e.g., "DOIT ESP32 DEVKIT V1") and port in the Arduino IDE, and upload the code.
Get the IP Address: Open the Serial Monitor (Tools > Serial Monitor) at 115200 baud. After connecting to Wi-Fi, the ESP32 will print its IP address (e.g., 192.168.1.100).
Control the Servo: Open a web browser on any device connected to the same local network and type in the IP address. You should see the control page. Move the slider, and your servo should move in real time.
| Symptom | Likely Cause & Solution |
|---|---|
| Servo jitters or doesn't move | Insufficient power. This is the #1 issue. Use an external 5V power supply for the servo, with a common ground to the ESP32. |
| ESP32 resets when servo moves | Power surge. Again, use an external power supply. A capacitor (e.g., 1000µF) across the servo's power and ground rails near the servo can also help smooth current spikes. |
| "Failed to connect" to Wi-Fi | Double-check SSID/password. Ensure you're on a 2.4 GHz network (ESP32 generally doesn't support 5 GHz). Check for special characters in credentials. |
| "Can't reach this page" in browser | Verify the IP address from the Serial Monitor. Ensure your computer/phone is on the same local network as the ESP32. Disable VPNs or guest networks temporarily. |
| Slider moves but servo doesn't | Check wiring, especially the signal wire to the correct GPIO. Verify the servo is working with a basic sweep test first (use the Sweep example from the ESP32Servo library). |
Congratulations on building your basic web server! Here are ways to expand its functionality:
Multiple Servo Control: Duplicate the Servo object and HTML slider elements to control 2 or 3 servos independently (remember to use external power!).
Stylish Interface: Use CSS frameworks like Bootstrap to create a professional-looking control panel with buttons for preset positions (e.g., "Open," "Close," "45°").
Secure Access: Implement password protection on the webpage or use ESP32's HTTPS capabilities for secure communication.
Internet (IoT) Control: Use a service like Blynk, IoT MQTT, or ESP32's built-in WebSocket support to control the servo from anywhere in the world.
Physical Feedback: Add a potentiometer to read the servo's actual position and display it on the web page for a closed-loop system.
This guide synthesizes practical steps with crucial contextual knowledge about power management and network communication. By understanding both the "how" and the "why," you are now equipped to integrate servo motors into robust, reliable ESP32 IoT projects.
======================================


No account yet?
Create an Account