
EMC/EMI Checklist Before Your Board Goes to Certification
EMC testing is expensive, and failing it is worse than the test fee — it costs you a respin, a
Imagine having a sleek, customizable digital clock on your desk that you built yourself. Not just any clock, but one with a vibrant touchscreen, accurate network time, and a stylish interface—all for a fraction of the cost of a commercial smart display.
In this comprehensive guide, we'll show you exactly how to transform the popular ESP32 Cheap Yellow Display (CYD) into a stunning digital clock using the powerful LVGL graphics library. You'll learn to fetch the precise time from the internet and display it in a large, easy-to-read format.
This project is the perfect blend of form and function. It's simple enough for beginners but offers the depth and customization that experienced makers love.
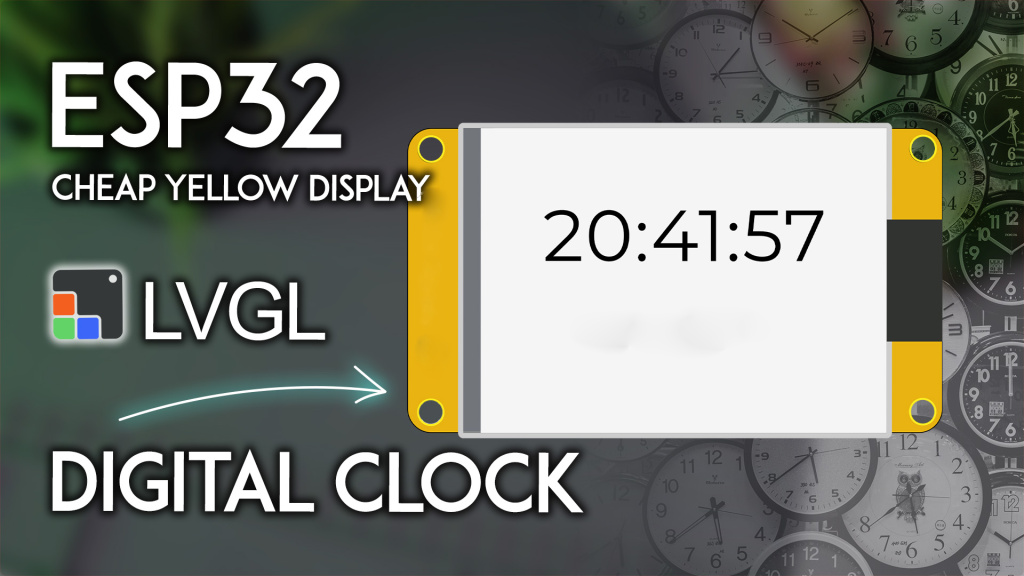
Why buy a basic LED clock when you can build a smart, connected one? Here’s why this project is a winner:
Unbeatable Accuracy: We use the timeapi.io API to get the exact time for your specific timezone. No more fiddly buttons to set the time; it syncs automatically over Wi-Fi.
Stunning Visuals: The 2.8-inch TFT display shows the time and date in crisp, large fonts. With LVGL, you can easily customize colors, fonts, and layouts to match your style.
A Powerful Learning Tool: This project is a fantastic introduction to key IoT concepts: connecting an ESP32 to Wi-Fi, making HTTP requests, parsing JSON data, and building a professional GUI with LVGL.
Cost-Effective & Expandable: The ESP32 CYD board is incredibly affordable. Plus, once you've built the clock, you can easily expand it. Add weather data, a touch interface to set alarms, or connect it to your home automation system.
This isn't just about following instructions; it's about gaining the skills to build any IoT device you can imagine.
In this project, your ESP32 CYD will be dedicated to displaying a clean and elegant clock interface. Here’s what it will show:
Large, Central Time Display: Hours, minutes, and seconds in a bold, easy-to-read font.
Current Date: Displayed clearly below the time.
Automatic Hourly Sync: The time is fetched from the internet at startup and re-synced every hour to correct for the ESP32's internal clock drift, ensuring long-term accuracy.
The beauty of this project is its simplicity. You only need a few core components, all of which we've tested to ensure perfect compatibility.
The Brain & Display: ESP32-2432S028R (The "Cheap Yellow Display" or CYD)
This all-in-one board is the star of the show. It combines a powerful ESP32-WROOM-32 module with a 2.8-inch TFT touchscreen, RGB LED, and microSD card slot. It's the perfect platform for any GUI project.
A USB Cable: A standard Micro-USB cable for power and programming.
A Computer: With the Arduino IDE installed (version 2.x recommended).
That's it! You're ready to build a clock that looks and functions better than many store-bought alternatives.
Follow these steps carefully. We've structured this guide to ensure success and help you understand why each step is important.
Phase 1: Essential Setup (Don't Skip This!)
Skipping the configuration steps is the most common reason for project failure. We've created dedicated guides to get your environment perfect.
Install ESP32 Boards in Arduino IDE: You need to add the ESP32 board package. This tells the Arduino software how to compile code for your chip.
Get to Know Your CYD: Understanding the board's layout and potential is key.
Install and Configure Libraries (The Critical Part): This project relies on two powerful libraries that must be configured correctly.
LVGL (Light and Versatile Graphics Library): For creating the beautiful graphical interface.
TFT_eSPI: For communicating with the display hardware.
⚠️ Important: Generic library installs will not work. You must use the specific lv_conf.h and User_Setup.h configuration files provided in our dedicated setup tutorial. Using the wrong files will result in a blank screen.
Install ArduinoJson Library: We'll use this to parse the time data from the API. Go to Sketch > Include Library > Manage Libraries, search for "ArduinoJson," and install the version by Benoit Blanchon (we used version 7.0.4 for this project).
Phase 2: Personalizing and Uploading the Code
Now you'll make the project your own by adding your Wi-Fi details and timezone.
Copy the Complete Arduino Code:
Copy the full code provided below into your Arduino IDE. This is the tested, working sketch.
/*  Rui Santos & Sara Santos - Random Nerd Tutorials - https://RandomNerdTutorials.com/esp32-cyd-lvgl-digital-clock/
    Full tutorial and explanation available at the URL above.
    ... [rest of the code as provided in the original article] ...
*/
Insert Your Wi-Fi Credentials: Find these lines and replace the placeholders with your actual network name and password.
const char* ssid = "REPLACE_WITH_YOUR_SSID";
const char* password = "REPLACE_WITH_YOUR_PASSWORD";
Set Your Timezone: You need to set your specific timezone for the API to return the correct local time. Find the timezone variable and replace the example with your own (e.g., "America/New_York", "Europe/London", "Asia/Tokyo"). A full list of available timezones can be found in the tutorial link.
const char* timezone = "Europe/Lisbon"; // Change this to your timezone
Phase 3: Uploading and Troubleshooting
Select Your Board and Port: Go to Tools > Board and select ESP32 Dev Module. Then, select the correct COM port under Tools > Port.
Fix the "Sketch Too Big" Error: The LVGL library and fonts make this sketch large. If you see an error about the sketch being too big, you need to change the flash partition scheme. Go to Tools > Partition Scheme and select "Huge APP (3MB No OTA/1MB SPIFFS)" or any option with an APP size larger than 1.4MB. This is a common step for advanced ESP32 projects.
Upload and Enjoy: Click the upload button. After a successful upload, the display will initialize, connect to Wi-Fi, fetch the time, and your custom digital clock will come to life!
Building your own digital clock is a rite of passage for makers. With the ESP32 CYD, it's also incredibly satisfying. You'll end up with a functional, attractive gadget for your home and the confidence to tackle much larger projects.
======================================
No account yet?
Create an Account